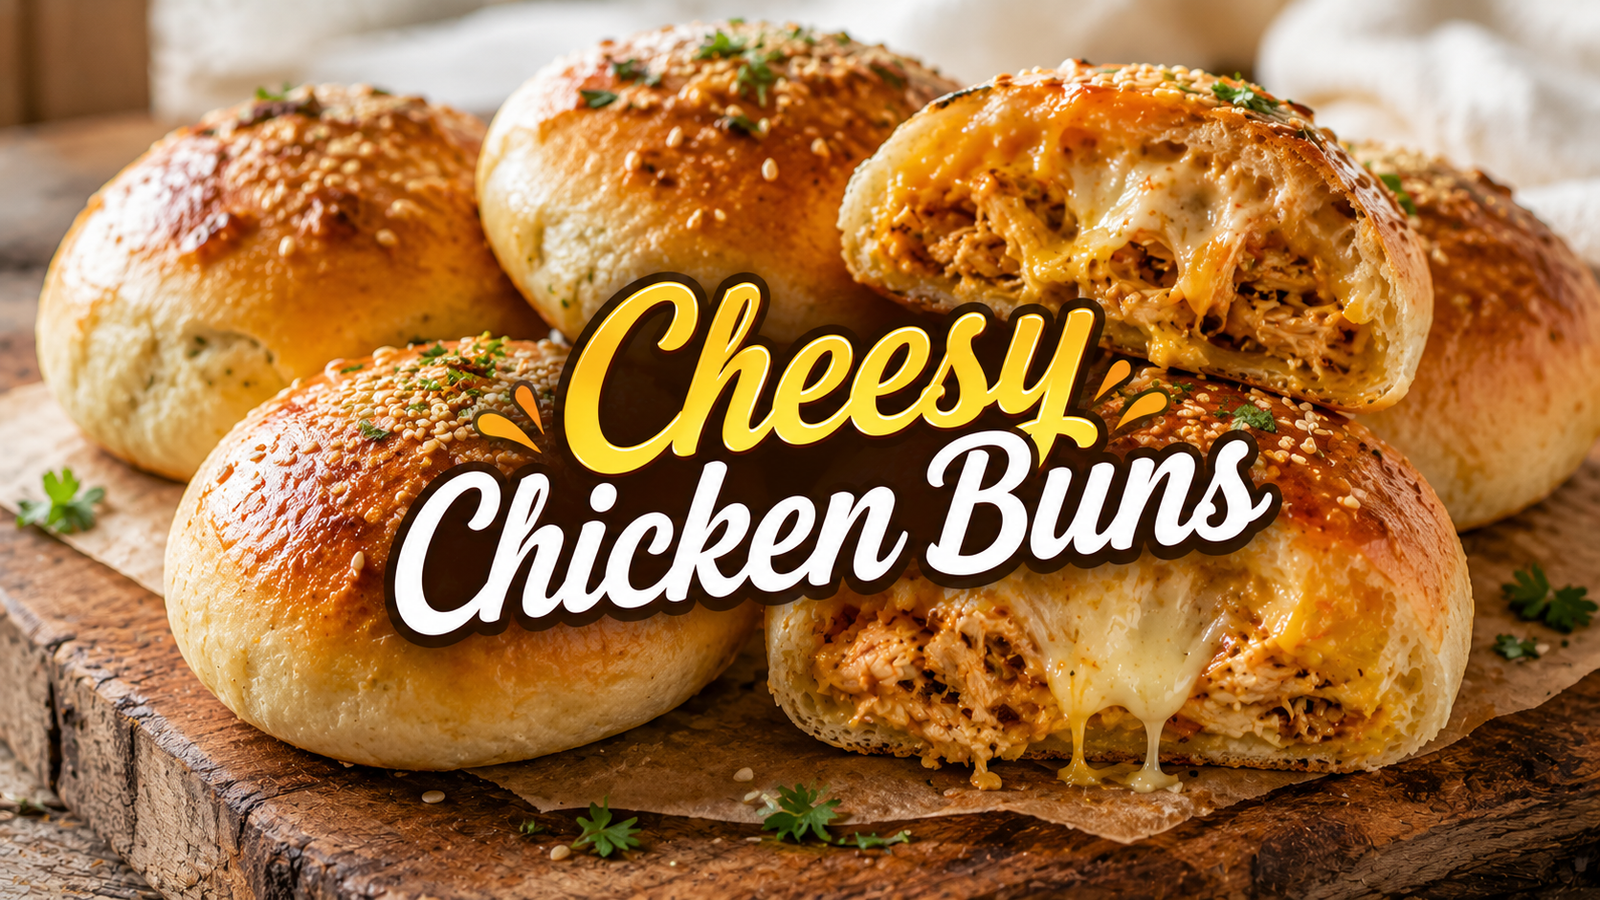
Soft, fluffy buns filled with juicy seasoned chicken and gooey melted cheese make these Cheesy Chicken Buns an irresistible homemade treat.
The dough is light and tender, while the savory chicken filling adds plenty of flavor. A generous layer of melted cheese brings everything together for a warm, rich, satisfying bite.
These chicken-filled buns are simple enough for beginners and practical enough for busy days. They work beautifully as a snack, lunchbox option, party food, or quick family dinner.
The best part is the texture. The outside becomes lightly golden and soft, while the inside stays fluffy with a flavorful chicken and cheese center.
For another easy homemade idea, serve these buns alongside [a simple homemade chicken recipe] or add [an easy cheesy snack] to a party-style spread.
Ingredients
For the Dough
- 3 cups (375 g) all-purpose flour
- 2 1/4 teaspoons (7 g) instant yeast
- 2 tablespoons sugar
- 1 teaspoon salt
- 3/4 cup (180 ml) warm milk
- 1 large egg
- 3 tablespoons melted butter
- 2 tablespoons plain yogurt
For the Chicken Filling
- 1 tablespoon cooking oil
- 1 pound (450 g) boneless, skinless chicken breast, finely chopped
- 1 small onion, finely chopped
- 2 cloves garlic, minced
- 1/2 teaspoon salt
- 1/2 teaspoon black pepper
- 1 teaspoon paprika
- 1/2 teaspoon chili powder
- 1/2 teaspoon ground cumin
- 2 tablespoons chopped fresh cilantro
- 1 tablespoon tomato paste
- 2 tablespoons water
For the Cheese Filling
- 1 1/2 cups (150 g) shredded mozzarella cheese
- 1/2 cup (50 g) shredded cheddar cheese
For the Egg Wash
- 1 egg
- 1 tablespoon milk
- 1 tablespoon sesame seeds, optional
Tools Needed
- Large mixing bowl
- Small mixing bowl
- Large skillet
- Wooden spoon or spatula
- Rolling pin
- Baking tray
- Parchment paper
- Pastry brush
- Clean kitchen towel
Halal-Friendly Ingredient Note
Use halal-certified chicken and cheese where required. Check packaged ingredients such as yeast, sauces, and seasonings for alcohol-based additives or other ingredients that do not fit halal requirements.
Step-by-Step Instructions
1. Make the dough
Add flour, instant yeast, sugar, and salt to a large mixing bowl.
Pour in the warm milk, egg, melted butter, and yogurt. Mix until a soft dough begins to form.
2. Knead the dough
Transfer the dough to a lightly floured surface.
Knead for about 7-8 minutes until smooth, soft, and elastic. The dough should feel slightly tacky but should not stick heavily to the hands.
Avoid adding too much extra flour because this can make the finished buns dense.
3. Let the dough rise
Place the dough in a lightly greased bowl.
Cover it with a clean kitchen towel and leave it in a warm place for about 1 hour, or until it has roughly doubled in size.
4. Cook the chicken filling
Heat the oil in a large skillet over medium heat.
Add the chopped onion and cook for 2-3 minutes until softened.
Add the garlic and cook for about 30 seconds.
5. Season the chicken
Add the chopped chicken to the skillet.
Cook for 5-7 minutes, stirring occasionally, until the chicken is cooked through.
Add salt, black pepper, paprika, chili powder, cumin, tomato paste, and water.
Stir well and cook for another 2 minutes until the filling looks juicy but not watery.
6. Finish the filling
Turn off the heat and stir in the chopped cilantro.
Transfer the chicken filling to a bowl and allow it to cool before filling the buns.
A cool filling is easier to handle and helps prevent the dough from becoming difficult to seal.
7. Prepare the cheese
Mix the shredded mozzarella and cheddar in a small bowl.
The mozzarella provides a soft, stretchy melt, while cheddar adds a richer savory flavor.
8. Divide the dough
Once the dough has risen, gently press it down to remove excess air.
Divide it into 10 equal pieces.
Shape each piece into a smooth ball.

9. Flatten each dough ball
Take one dough ball and flatten it gently with the palm of the hand.
Use a rolling pin to make a small round disc about 4-5 inches wide.
Keep the center slightly thicker than the edges if possible.
10. Add the chicken and cheese
Place about 2 tablespoons of chicken filling in the center of the dough.
Add about 2 tablespoons of the shredded cheese mixture on top.
Do not overfill the dough because excess filling can make sealing difficult.
11. Seal the bun
Bring the edges of the dough toward the center.
Pinch the edges together firmly to seal the filling inside.
Turn the bun over and gently shape it into a smooth round.
Repeat with the remaining dough, chicken, and cheese.
12. Arrange the buns
Line a baking tray with parchment paper.
Place the filled buns seam-side down, leaving a little space between each one.
Cover loosely with a clean towel and let them rest for 20-25 minutes.
This second rise helps create a lighter, fluffier texture.
13. Prepare the egg wash
Whisk one egg with 1 tablespoon of milk.
Brush the tops of the buns lightly with the egg wash.
Sprinkle with sesame seeds if desired.
14. Bake the buns
Preheat the oven to 375°F (190°C).
Bake the buns for about 18-22 minutes, or until the tops are golden brown.
The exact baking time can vary slightly depending on the size of the buns and the oven.
15. Cool and serve
Remove the buns from the oven and let them cool for about 5-10 minutes.
The cheese will be hot and melted immediately after baking, so a short resting period makes them easier to eat.
Serve warm for the best soft texture and cheesy center.
Tips & Variations
Keep the dough soft
A soft dough creates softer buns.
Avoid adding large amounts of flour while kneading. If the dough feels slightly sticky, lightly grease the hands instead of continually adding flour.
Do not use hot milk
The milk should feel warm, not hot.
Very hot liquid can damage the yeast and prevent the dough from rising properly.
Cool the chicken before filling
Hot chicken filling can soften the dough and make it harder to seal.
Allow the cooked filling to cool until warm or room temperature before assembling the buns.
Avoid watery filling
The chicken mixture should be moist but not runny.
If excess liquid remains in the skillet, continue cooking for another minute or two before removing the filling from the heat.
Use different cheese
Mozzarella and cheddar create an excellent combination, but other halal-friendly melting cheeses can also work.
Monterey Jack, Colby, or a mild cheese blend can provide a slightly different flavor and texture.
Add vegetables
Finely diced bell pepper, sweet corn, or cooked spinach can be added to the chicken filling.
Keep vegetable additions modest so the buns remain easy to seal.
Make them spicy
For a spicier version, add finely chopped fresh green chili to the chicken filling.
A pinch of extra chili powder can also increase the heat without changing the filling texture.
Add herbs
Fresh cilantro works especially well with the seasoned chicken.
Parsley or a small amount of fresh green onion can also add a fresh, savory note.
Make smaller party buns
Divide the dough into 14-16 smaller portions instead of 10.
Use less filling in each bun and reduce the baking time slightly. Smaller buns are excellent for parties and lunchboxes.
Avoid overfilling
Too much chicken or cheese can cause the dough to split.
A tightly sealed bun with a moderate amount of filling will bake more evenly and stay neat.
Seal the dough firmly
Pinch the edges together several times before placing the bun seam-side down.
If the seal is weak, melted cheese may escape during baking.
Give the buns enough rising time
Skipping the second rise can result in heavier buns.
The short resting period after shaping helps the dough relax and creates a softer interior.
Add a crispy finish
For a slightly crispier exterior, bake the buns for an additional 1-2 minutes after they become golden.
Keep a close eye on them because the tops can brown quickly.
Make a creamy variation
For a richer filling, mix a small amount of cream cheese into the cooled chicken filling.
Use only enough to bind the mixture without making it wet.
For more homemade comfort food, pair these buns with [a creamy chicken side dish] or [an easy homemade dipping sauce].
Storage & Serving
Freshly baked buns taste best when served warm.
Allow leftovers to cool completely before storing them in an airtight container.
Keep the buns refrigerated for up to 3 days.
To reheat, place them in a preheated oven at 325°F (165°C) for about 8-10 minutes. This helps restore the soft bread texture without making the outside too chewy.
A microwave can also be used for a quick reheat. Warm one bun for about 20-30 seconds, then check the center.
For longer storage, the baked buns can be frozen for up to 2 months.

Wrap each bun individually in food-safe freezer wrap or place them in a freezer-safe airtight container. Thaw in the refrigerator before reheating.
For best results, avoid repeatedly freezing and thawing the buns.
These chicken buns are delicious on their own, but they can also be served with a simple yogurt dip, fresh salad, soup, or roasted vegetables.
For a lunchbox, pair one or two buns with cucumber slices, fruit, or a small salad.
They also make an excellent addition to a casual gathering. Arrange the warm buns on a platter and serve with a mild dipping sauce.
FAQ
Can Cheesy Chicken Buns be made without eggs?
Yes. The egg in the dough can be replaced with 2 tablespoons of plain yogurt or an appropriate egg substitute. The egg wash can simply be replaced with milk.
Why are the buns not fluffy?
Dense buns are often caused by too much flour, inactive yeast, or insufficient rising time.
The dough should become noticeably puffy during both rising stages.
Can cooked chicken be used for the filling?
Yes. Shredded cooked chicken can replace raw chopped chicken.
Reduce the cooking time and simply sauté the onion and garlic before adding the cooked chicken and seasonings.
Can the dough be prepared the night before?
Yes. The dough can be covered and refrigerated after kneading.
Allow it to come closer to room temperature and become slightly puffy before shaping the buns.
How do you stop cheese from leaking out?
Avoid overfilling and make sure the dough is sealed firmly.
Placing the buns seam-side down also helps keep the filling enclosed during baking.
Can Cheesy Chicken Buns be fried?
They can be adapted for frying, but baking gives a lighter and less greasy result.
For a crispier baked exterior, brush the tops lightly with egg wash and bake until deeply golden.
Can these buns be made without chili powder?
Yes. Simply leave out the chili powder for a milder filling.
Paprika, cumin, garlic, and black pepper will still provide plenty of savory flavor.
What is the best cheese for chicken buns?
Mozzarella is excellent for a stretchy melted center, while cheddar provides stronger flavor.
A combination of both gives a balanced texture and taste.
Can these buns be made smaller?
Yes. Smaller buns are ideal for parties, lunchboxes, and children’s snacks.
Divide the dough into more portions and use a smaller amount of filling in each bun.
Can frozen Cheesy Chicken Buns be reheated directly?
For the best texture, thaw them first in the refrigerator.
Reheat them in the oven until warm throughout. This keeps the bread softer and helps the cheese melt evenly.
Conclusion
These Cheesy Chicken Buns bring together everything that makes homemade baking so satisfying: soft fluffy bread, juicy seasoned chicken, and a warm, gooey cheese center.
The recipe uses straightforward ingredients and simple steps, making it approachable even for beginner bakers.
Serve the buns warm for the softest texture and richest cheesy flavor, or prepare a batch ahead for easy lunches and snacks.
With a golden top and savory filling hidden inside, these homemade buns are sure to disappear quickly. Give this easy recipe a try and share it with family and friends.