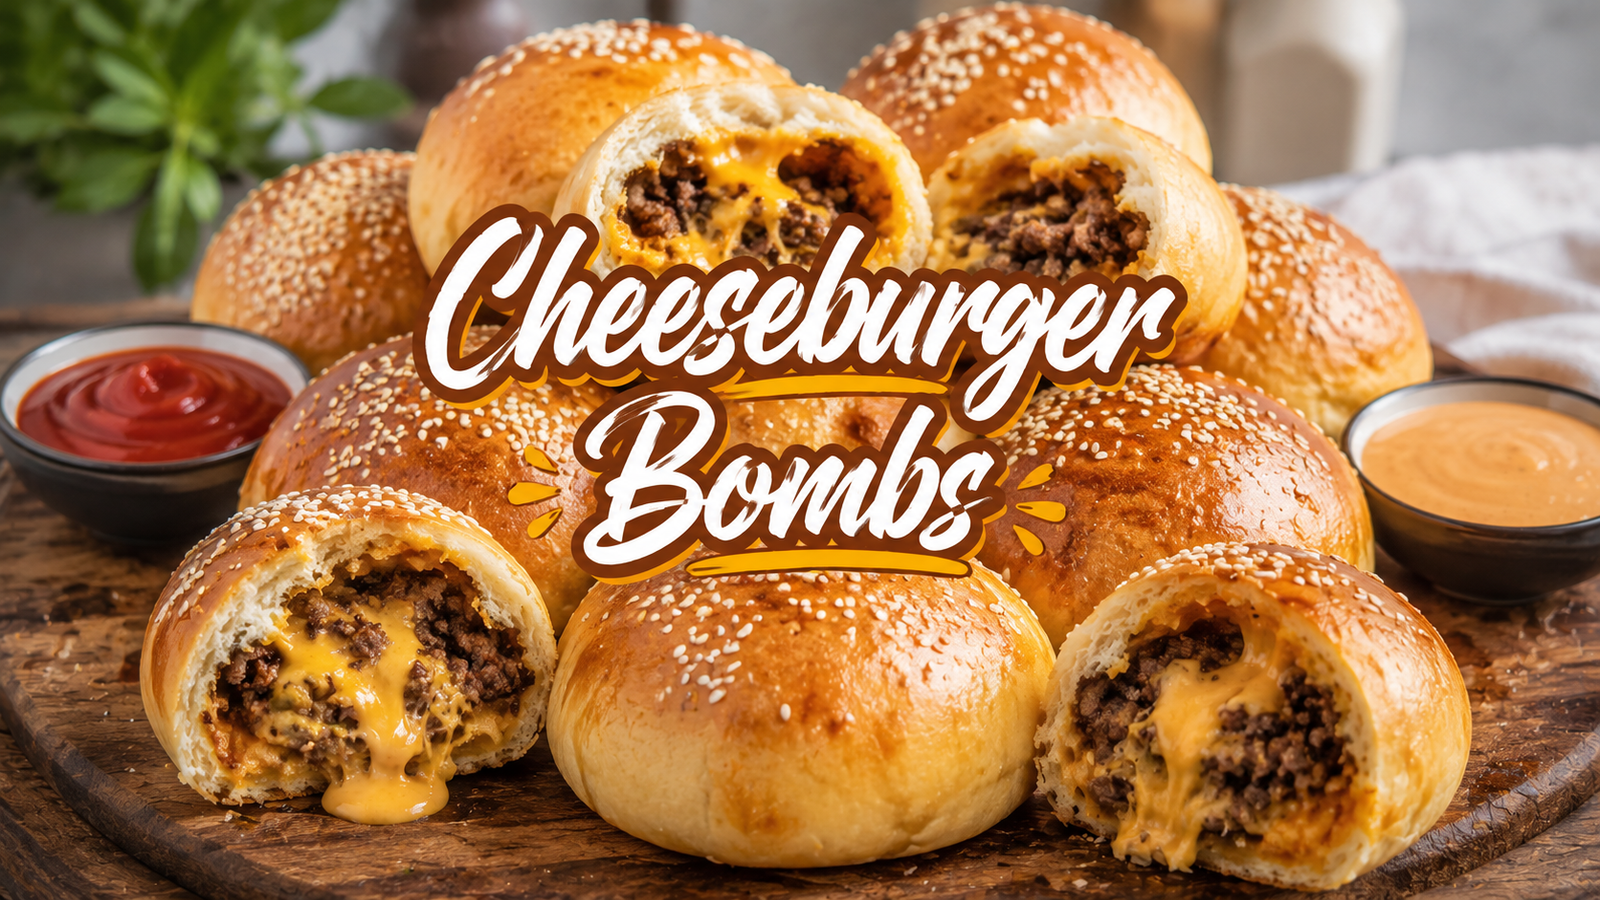
Soft, golden dough wrapped around juicy seasoned beef and gooey melted cheese makes these Cheeseburger Bombs impossible to resist.
Each bite has the familiar flavor of a classic cheeseburger, but everything is tucked inside a warm, fluffy dough pocket. The outside turns beautifully golden while the center stays rich, savory, and cheesy.
These homemade cheeseburger bites are simple enough for beginners and practical enough for busy weeknights. The filling comes together quickly, and refrigerated pizza dough keeps the preparation easy.
They also make a fantastic party appetizer. Serve them with ketchup, mustard, burger sauce, or a creamy dipping sauce for a fun finger-food meal.
Ingredients
For the cheeseburger filling
- 500 g halal ground beef
- 1 tablespoon olive oil
- 1 small yellow onion, finely diced
- 2 cloves garlic, minced
- 1 tablespoon ketchup
- 1 teaspoon yellow mustard
- 1 teaspoon Worcestershire-style sauce, halal-friendly and alcohol-free
- 1/2 teaspoon smoked paprika
- 1/2 teaspoon salt
- 1/4 teaspoon black pepper
- 120 g shredded cheddar cheese
For the dough
- 1 pound (450 g) refrigerated pizza dough, alcohol-free
- 2 tablespoons melted unsalted butter
- 1/2 teaspoon garlic powder
- 1 tablespoon sesame seeds
For serving
- 1/4 cup ketchup
- 1/4 cup mayonnaise
- 1 tablespoon yellow mustard
Ingredient note: Check packaged dough, sauces, condiments, and cheese labels to ensure they meet personal halal requirements. Choose halal-certified beef and alcohol-free Worcestershire-style sauce. Avoid sauces containing wine, beer, or other alcoholic ingredients.
Tools and Equipment
- Large skillet
- Wooden spoon or spatula
- Baking sheet
- Parchment paper
- Small mixing bowl
- Pastry brush
- Rolling pin
- Sharp knife or dough cutter
- Measuring spoons
- Cooling rack
Step-by-Step Instructions
1. Preheat the oven
Preheat the oven to 200°C (400°F).
Line a large baking sheet with parchment paper. This prevents the cheeseburger bombs from sticking and makes cleanup much easier.
2. Cook the onion and garlic
Heat the olive oil in a large skillet over medium heat.
Add the diced onion and cook for 2-3 minutes, until softened.
Add the minced garlic and cook for another 30 seconds. Stir frequently so the garlic does not burn.
3. Brown the beef
Add the halal ground beef to the skillet.
Break it apart with a wooden spoon and cook for 6-8 minutes, stirring occasionally, until browned and fully cooked.
Drain any excess grease if necessary.
4. Season the filling
Add ketchup, yellow mustard, Worcestershire-style sauce, smoked paprika, salt, and black pepper.
Stir well and cook for another 1-2 minutes.
The mixture should smell rich and savory, with a slightly sweet and tangy burger flavor.
Remove the skillet from the heat.
5. Cool the beef
Transfer the cooked beef mixture to a bowl.
Allow it to cool for about 10 minutes.
Cooling the filling slightly makes the dough much easier to handle and helps prevent the cheese from melting before the bombs reach the oven.
6. Add the cheese
Stir the shredded cheddar cheese into the warm beef mixture.
The cheese should be evenly distributed throughout the filling.
For the best texture, avoid adding extremely hot beef directly to the dough.
7. Prepare the dough
Unroll the pizza dough onto a lightly floured surface.
Cut the dough into 12 roughly equal pieces.
Roll each piece into a small circle approximately 4-5 inches wide.
The dough does not need to look perfectly round. A slightly rustic shape will still produce delicious golden cheeseburger bombs.

8. Fill each dough piece
Place approximately 2 tablespoons of the beef and cheese mixture in the center of each dough circle.
Do not overfill the dough. Too much filling can make the edges difficult to seal.
Leave a clear border around the filling.
9. Seal the bombs
Carefully pull the edges of the dough up and over the filling.
Pinch the edges together firmly to create a sealed ball.
Turn each bomb seam-side down and gently roll it between the palms to smooth the shape.
Make sure there are no visible gaps where the filling could escape.
10. Arrange on the baking sheet
Place the sealed cheeseburger bombs seam-side down on the prepared baking sheet.
Leave about 2 inches of space between each one.
This gives the dough enough room to puff and brown evenly.
11. Add the buttery topping
Mix the melted butter with the garlic powder.
Brush a thin layer over each dough ball using a pastry brush.
Sprinkle sesame seeds evenly over the tops.
The butter helps create a beautiful golden crust, while sesame seeds add a subtle nutty flavor and classic burger-style appearance.
12. Bake
Place the baking sheet in the preheated oven.
Bake for approximately 15-20 minutes, or until the dough is puffed and golden brown.
Cooking times can vary depending on the dough thickness and oven.
The exterior should feel firm and lightly crisp while the center remains soft and fluffy.
13. Make the dipping sauce
While the cheeseburger bombs bake, combine ketchup, mayonnaise, and mustard in a small bowl.
Stir until smooth and creamy.
Taste and adjust the mustard or ketchup if desired.
14. Cool briefly and serve
Remove the cheeseburger bombs from the oven.
Allow them to cool for 5 minutes before serving.
The filling will be extremely hot immediately after baking, so a short resting period makes them easier and safer to eat.
Serve warm with the dipping sauce.
Tips & Variations
Do not overfill the dough
It can be tempting to add a generous amount of filling to every dough piece.
However, too much filling makes sealing difficult and can cause the cheese and beef to leak during baking.
Keep the filling centered and leave enough dough around the edges for a secure seal.
Seal the edges properly
Pinch the dough firmly where the edges meet.
If there is any opening, melted cheese can escape during baking.
For extra security, pinch the seam twice before placing each bomb seam-side down.
Cool the filling first
Hot beef can make pizza dough soft and difficult to work with.
Allowing the filling to cool for a few minutes makes shaping much easier and gives better results.
Use freshly shredded cheddar
Freshly shredded cheddar melts smoothly and creates a delicious gooey center.
Pre-shredded cheese can also work, but some varieties contain ingredients that affect how smoothly the cheese melts.
Try different cheeses
Cheddar provides classic cheeseburger flavor, but several other cheeses work well.
Monterey Jack creates an especially creamy filling, while mozzarella adds an extra stretchy texture.
A cheddar and mozzarella combination is another excellent option.
Add pickles
Finely diced dill pickles can add the tangy crunch associated with a classic cheeseburger.
Use approximately 2 tablespoons of finely chopped pickles and drain them well before adding them to the beef.
Add a little heat
For spicy cheeseburger bombs, add 1/4 teaspoon crushed red pepper flakes to the beef mixture.
Finely diced jalapeños can also be added for a fresh, spicy kick.
Make bacon-style cheeseburger bombs
For a halal version, use cooked halal beef bacon or another halal-certified beef bacon product.
Chop it finely and stir it into the cooled beef mixture along with the cheese.
Always check the package ingredients and certification before using processed meat products.
Add mushrooms
Finely chopped mushrooms can add a rich, savory flavor.
Cook them with the onion until their moisture has evaporated before adding the beef.
This prevents the filling from becoming watery.
Use ground chicken
Ground chicken can replace the beef for a lighter variation.
Because chicken has a milder flavor, a little extra garlic, smoked paprika, or mustard can help boost the savory taste.
Use halal-certified ground chicken.
Make mini cheeseburger bombs
For parties, cut the dough into smaller pieces and use about 1 tablespoon of filling per piece.
The smaller size creates bite-sized cheeseburger appetizers that are easy to serve on a platter.
Reduce the baking time slightly and watch the dough closely as it browns.
Make them extra crispy
For a slightly crispier exterior, bake the bombs on a preheated baking sheet.
The direct heat from the hot tray helps the bottom develop a light golden crust.
Use parchment paper to make removal easier.
Avoid wet fillings
Moisture is one of the biggest enemies of stuffed dough.
Drain excess grease from the beef and make sure ingredients such as pickles or mushrooms are not carrying excess liquid.
A drier filling helps the dough bake fluffy instead of soggy.
Common mistakes to avoid
Overfilling: Too much beef and cheese can split the dough.
Loose seams: A weak seal allows melted cheese to escape.
Using hot filling: Very hot filling can soften the dough and make shaping difficult.
Overbaking: Leaving the bombs in the oven too long can make the dough dry.
Cutting immediately: The melted cheese inside needs a few minutes to settle after baking.
Crowding the pan: Too little space can prevent the dough from browning evenly.
Storage & Serving
Cheeseburger Bombs taste best when served warm and fresh from the oven.
Any leftovers should be cooled completely before being placed in an airtight container.
Refrigerate leftovers for up to 3 days.
To reheat, place the bombs in a 180°C (350°F) oven or air fryer until warmed through. Reheating in the oven helps restore some of the golden exterior instead of making the dough soft.
A microwave can be used for convenience, but the dough will have a softer texture.
For longer storage, baked cheeseburger bombs can be frozen.

Place completely cooled bombs on a baking sheet and freeze until firm. Transfer them to a freezer-safe airtight container or bag.
Freeze for up to 2 months for the best quality.
Reheat frozen bombs in a 180°C (350°F) oven until hot throughout. There is no need to thaw them first, although frozen pieces will take longer to heat.
Serve the bombs with ketchup, mustard, creamy burger sauce, or a simple garlic mayonnaise.
They also pair well with crispy potato wedges, a fresh green salad, or crunchy coleslaw.
Frequently Asked Questions
Can store-bought pizza dough be used?
Yes. Refrigerated pizza dough is one of the easiest options for this recipe.
Choose a dough that contains no alcohol-based ingredients and check the label for personal dietary requirements.
Can Cheeseburger Bombs be made in an air fryer?
Yes. Arrange them in a single layer and air fry at approximately 180°C (350°F) until the dough is golden and the center is hot.
Work in batches if necessary to avoid overcrowding.
Can the beef filling be prepared ahead?
Yes. The beef mixture can be cooked a day ahead and refrigerated in a sealed container.
Bring it out shortly before assembling and mix with the cheese once it has cooled slightly.
Why are the bottoms of the bombs soggy?
Excess moisture in the filling is usually the main reason.
Drain excess beef grease and avoid adding watery vegetables. Baking on a properly preheated oven also helps the bottoms become more golden.
Can crescent dough replace pizza dough?
Yes, if a suitable alcohol-free crescent-style dough is available.
It will produce a softer, more buttery exterior and may require a slightly different baking time.
Can these be made without sesame seeds?
Absolutely. Sesame seeds are optional and mainly provide flavor and appearance.
The bombs will still develop a beautiful golden crust without them.
What cheese melts best inside cheeseburger bombs?
Cheddar, mozzarella, Monterey Jack, and mild Colby-style cheeses all melt well.
A combination of cheddar and mozzarella gives both strong flavor and a stretchy texture.
Can Cheeseburger Bombs be frozen before baking?
Yes. Assemble and seal the bombs, then freeze them in a single layer until firm.
Transfer them to a freezer-safe container. Add a little extra baking time when cooking directly from frozen and make sure the center is thoroughly hot.
How can the dough be prevented from opening?
Avoid overfilling and pinch the edges firmly.
Placing the finished bombs seam-side down on the baking sheet also helps keep the closure secure during baking.
What sauce goes best with Cheeseburger Bombs?
Ketchup, mustard, burger sauce, garlic mayonnaise, and barbecue-style sauce all pair well.
For a creamy dip, mix mayonnaise with a little ketchup and mustard.
Conclusion
These Cheeseburger Bombs take the familiar flavors of a juicy cheeseburger and turn them into soft, golden, handheld bites filled with seasoned beef and melty cheddar.
The preparation is straightforward, the ingredients are easy to find, and the finished bombs are perfect for both casual dinners and gatherings.
Keep the filling slightly cooled, avoid overfilling the dough, and seal each bomb firmly before baking. The result is a warm, fluffy exterior with a rich, savory, cheesy center.
Serve them fresh with creamy dipping sauce, crispy potatoes, or a simple salad for a meal that feels fun without requiring complicated cooking.
For an easy, comforting recipe packed with classic burger flavor, Cheeseburger Bombs are a delicious choice to add to the menu.