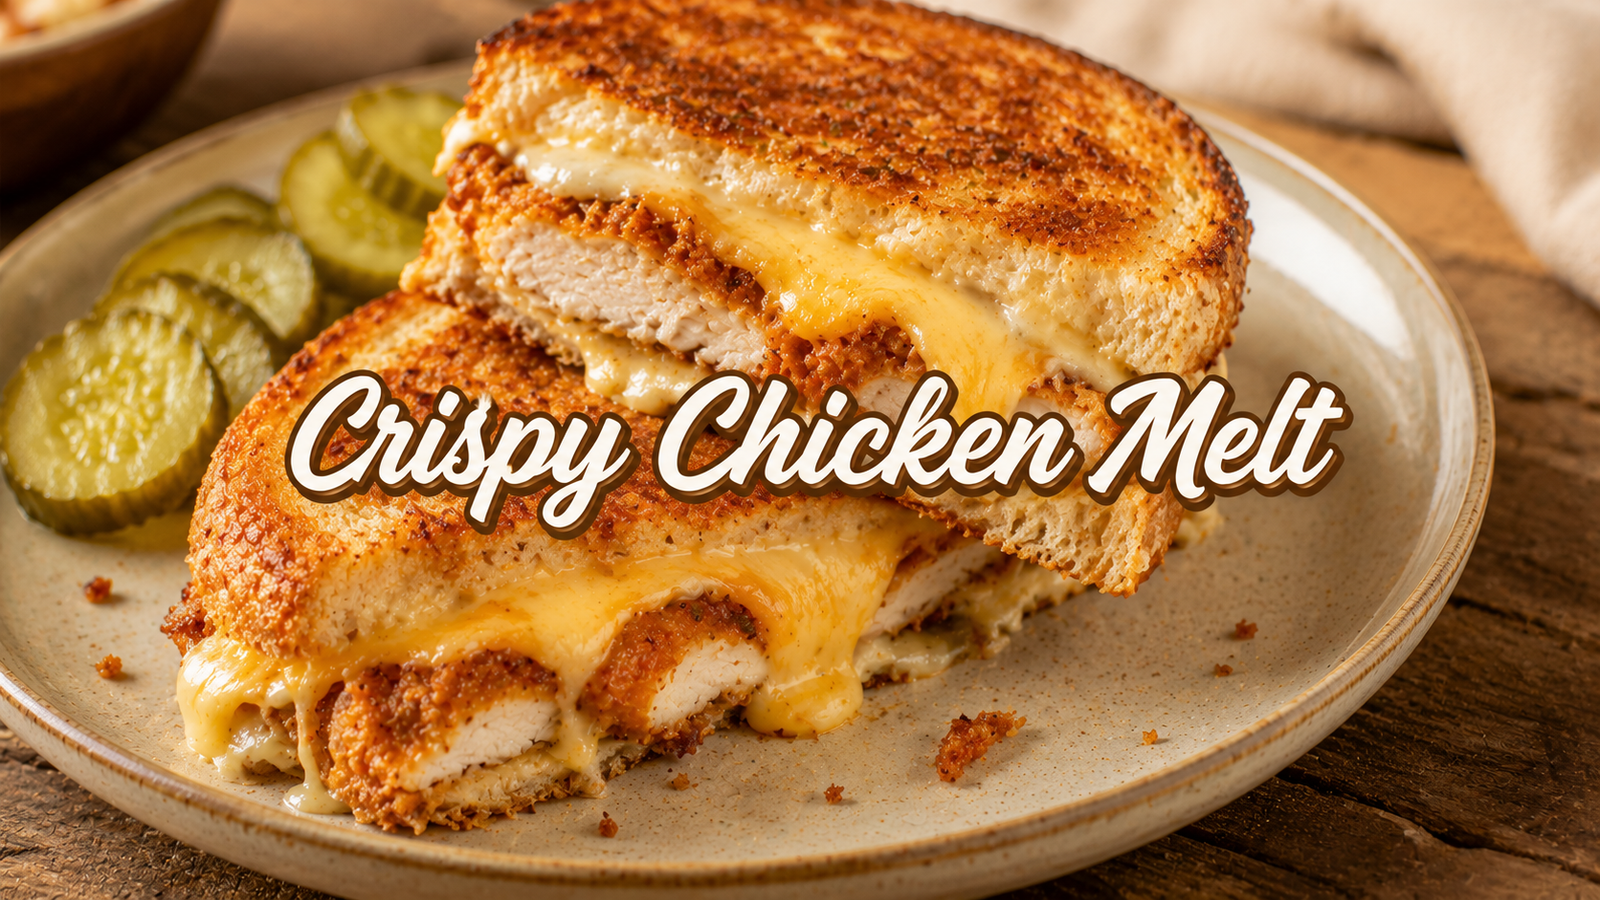
Crunchy golden chicken, gooey melted cheese, creamy sauce, and buttery toasted bread come together in every bite of this irresistible Crispy Chicken Melt. It is crispy on the outside, juicy in the middle, and rich without being complicated.
This easy chicken melt turns simple ingredients into a hot, satisfying meal that works beautifully for lunch, dinner, or a quick weekend treat. The chicken is coated in seasoned crumbs and cooked until crisp, then layered with cheese and sauce before being toasted between slices of bread.
The result is similar to the comfort of a crispy chicken sandwich with the cheesy goodness of a classic melt. The bread becomes golden and crunchy while the cheese melts into the warm chicken.
There is no need for complicated equipment or difficult cooking techniques. Everything can be prepared with a skillet, a few basic ingredients, and about 30 minutes.
This recipe is especially useful for busy home cooks because the ingredients are affordable, easy to find, and simple to prepare.
For another comforting meal, pair the melt with a fresh side such as a crunchy homemade salad or oven-baked potatoes.
Why This Crispy Chicken Melt Is So Good
The best part of a chicken melt is the contrast between textures. The outside should be crisp and golden, while the chicken inside stays tender and juicy.
A light coating of seasoned breadcrumbs gives the chicken a satisfying crunch without making it overly thick. The chicken is then topped with cheese while still warm, allowing it to melt into a creamy layer.
The bread adds another texture. Buttered slices toasted in a skillet develop crisp edges and a soft center, creating the perfect base for the chicken and cheese.
A simple creamy sauce brings everything together. Mayonnaise, mustard, and a little garlic create a tangy, savory spread that complements the crispy chicken without overpowering it.
The recipe can also be adjusted easily. Add sliced tomatoes, lettuce, pickles, caramelized onions, or a little heat depending on the flavor preferred.
For a similar handheld meal, a homemade chicken sandwich is another easy option for a busy weeknight.
Ingredients
For the Crispy Chicken
- 2 large boneless, skinless chicken breasts, about 1 pound total
- ½ cup all-purpose flour
- 1 large egg
- 2 tablespoons milk
- 1 cup plain breadcrumbs
- 1 teaspoon garlic powder
- 1 teaspoon paprika
- ½ teaspoon onion powder
- ½ teaspoon salt
- ¼ teaspoon black pepper
- 3 tablespoons vegetable oil, for cooking
For the Creamy Sauce
- ¼ cup mayonnaise
- 1 tablespoon yellow mustard
- ½ teaspoon garlic powder
- ¼ teaspoon black pepper
For the Melts
- 8 slices sandwich bread
- 4 slices halal-friendly cheddar cheese
- 4 slices halal-friendly mozzarella or provolone cheese
- 2 tablespoons softened butter
- ½ cup thinly sliced pickles, optional
- ½ cup thinly sliced tomato, optional
All ingredients are alcohol-free and suitable for a halal-friendly preparation. For strict halal requirements, check packaged bread, cheese, mayonnaise, mustard, breadcrumbs, and seasonings for brand-specific ingredients and halal certification where needed.
Tools Needed
- Large skillet or frying pan
- Cutting board
- Sharp knife
- 3 shallow bowls
- Meat mallet or rolling pin
- Spatula
- Tongs
- Small mixing bowl
- Paper towels or a wire rack
Step-by-Step Instructions
1. Prepare the Chicken
Place each chicken breast on a cutting board.
Carefully slice each breast horizontally through the middle to create four thinner chicken pieces.
If the pieces are still uneven, place them between two sheets of plastic wrap or parchment paper and gently pound them to an even thickness.
Even pieces cook more consistently and make the melts easier to assemble.
2. Prepare the Seasoned Coating
Place the flour in one shallow bowl.
In a second bowl, whisk together the egg and milk until smooth.
In a third bowl, combine the breadcrumbs, garlic powder, paprika, onion powder, salt, and black pepper.
Keep the bowls next to each other to make the coating process quick and easy.
3. Coat the Chicken
Take one piece of chicken and coat it lightly in flour.
Shake off any excess, then dip it into the egg mixture.
Finally, press it into the seasoned breadcrumbs until completely coated.
Repeat with all four chicken pieces.
Pressing the breadcrumbs gently onto the chicken helps create a crisp, even crust.
4. Cook the Chicken
Heat the vegetable oil in a large skillet over medium heat.
Once the oil is hot, carefully add the coated chicken pieces.
Cook for about 4 to 5 minutes per side, depending on thickness.
The coating should become deep golden and crisp, while the chicken should reach an internal temperature of 165°F (74°C).
Transfer the chicken to a wire rack or paper towel-lined plate.
Do not stack the cooked chicken pieces because trapped steam can soften the crispy coating.
5. Make the Creamy Sauce
Add the mayonnaise, mustard, garlic powder, and black pepper to a small bowl.
Stir until smooth and creamy.
Taste and adjust the mustard or pepper if desired.
The sauce should be creamy with a mild tang that balances the rich cheese and crispy chicken.

6. Prepare the Bread
Spread softened butter over one side of each bread slice.
Spread the creamy sauce over the opposite side of four slices.
The buttered side will become the golden outside of the melt, while the sauce will sit against the filling.
7. Build the Melts
Place one sauced bread slice on a clean work surface, sauce-side up.
Add one crispy chicken piece.
Top with one slice of cheddar and one slice of mozzarella or provolone.
Add pickles or tomato if using.
Place another bread slice on top with the buttered side facing outward.
Repeat with the remaining ingredients.
8. Toast the Melts
Heat a clean skillet over medium-low heat.
Place two assembled melts in the skillet.
Cook for about 3 to 4 minutes on the first side, pressing gently with a spatula.
Carefully flip and cook for another 3 to 4 minutes.
The bread should be crisp and golden, and the cheese should be fully melted.
If the bread is browning too quickly before the cheese melts, reduce the heat.
9. Finish and Slice
Transfer the finished melts to a cutting board.
Let them rest for about 1 minute before slicing.
Cut each melt in half and serve while hot.
The best bite has crunchy toasted bread, crisp chicken, creamy sauce, and stretchy melted cheese together.
Tips & Variations
Pound the Chicken Evenly
Uneven chicken pieces can cook at different speeds.
Pounding the chicken to a similar thickness helps every piece cook evenly while keeping the inside tender.
Do Not Use High Heat
High heat can brown the breadcrumbs too quickly while leaving the chicken undercooked.
Medium heat works best for the chicken, while medium-low heat is ideal for toasting the assembled melts.
Keep the Coating Dry
Moisture is the enemy of a crispy coating.
After dipping the chicken in the egg mixture, allow excess egg to drip away before pressing it into the breadcrumbs.
Let the Chicken Rest on a Rack
A wire rack allows air to circulate around the chicken.
This keeps the bottom from becoming soggy while the chicken cools slightly before assembly.
Choose a Good Melting Cheese
Cheddar provides a richer, sharper flavor, while mozzarella gives the melt a stretchy, creamy texture.
Provolone is another excellent choice because it melts smoothly and adds a mild savory flavor.
A combination of two cheeses creates the best balance of flavor and texture.
Add Pickles for a Tangy Bite
Pickles cut through the richness of the crispy chicken and cheese.
Use thinly sliced dill pickles so they add flavor without making the bread difficult to toast.
Add Caramelized Onions
For a sweeter, richer version, add caramelized onions to the filling.
Cook one sliced onion slowly in a lightly oiled skillet until soft and golden, then add a spoonful to each sandwich.
Make It Spicy
Add ¼ teaspoon of cayenne pepper to the breadcrumb mixture for a gentle kick.
For more heat, add sliced halal-friendly jalapeños or a small amount of hot sauce to the creamy sauce.
Use Panko Breadcrumbs
Panko creates an especially light and crunchy coating.
Replace the regular breadcrumbs with 1 cup of plain panko breadcrumbs for a more pronounced crunch.
Try Different Bread
Thick sandwich bread works particularly well because it can hold the crispy chicken without becoming too soft.
Sourdough, multigrain bread, or a sturdy white bread can also be used.
Avoid very thin bread because it may become overly crisp before the cheese melts.
Add Fresh Vegetables
Tomato, lettuce, cucumber, or thinly sliced onions can add freshness.
For the crispiest result, add lettuce after toasting instead of cooking it inside the melt.
Common Mistakes to Avoid
One common mistake is overcrowding the skillet when cooking the chicken.
Too many pieces at once can lower the pan temperature and prevent the coating from becoming crisp.
Another mistake is using cold butter directly from the refrigerator. Softened butter spreads more evenly and helps the bread toast consistently.
Avoid adding too much sauce. A thin layer is enough to add creaminess without making the bread soggy.
Finally, do not rush the final toast. Moderate heat gives the cheese enough time to melt while the bread becomes beautifully golden.
Storage & Serving
A Crispy Chicken Melt is best served immediately because the coating and toasted bread are at their crispiest when fresh.
If leftovers remain, allow them to cool before placing them in an airtight container.
Store assembled melts in the refrigerator for up to 3 days.

For the best texture, reheat them in a skillet over medium-low heat for several minutes per side. An air fryer can also restore some of the crispness.
Reheating in the microwave is possible, but the bread and chicken coating will become softer.
For meal prep, the crispy chicken can be cooked separately and refrigerated for up to 3 days. Assemble and toast the melts just before serving for a fresher texture.
Cooked chicken can also be frozen in an airtight freezer-safe container for up to 2 months. Thaw it in the refrigerator before reheating.
What to Serve With a Crispy Chicken Melt
This melt is filling on its own, but a simple side can turn it into a complete meal.
Try serving it with:
- Crispy potato wedges
- Fresh green salad
- Cucumber tomato salad
- Sweet potato fries
- Coleslaw
- Pickle spears
- Corn on the cob
- Fresh fruit
A cool yogurt-based dip is especially good alongside the hot, crispy sandwich.
For a lighter option, serve the melt with a fresh cucumber salad. For a classic comfort-food plate, pair it with crispy potato wedges.
A homemade tomato soup also makes an excellent pairing because the warm, creamy soup complements the crunchy chicken and melted cheese.
Frequently Asked Questions
Can chicken thighs be used instead of chicken breast?
Yes. Boneless, skinless chicken thighs work well and have a naturally richer flavor.
Trim excess fat and pound thicker pieces slightly so they cook evenly.
Can the crispy chicken be baked instead of pan-fried?
Yes. Place the coated chicken on a lightly greased baking sheet and spray or brush the coating lightly with oil.
Bake at 425°F (220°C) until golden and the center reaches 165°F (74°C). Cooking time will vary depending on thickness.
What cheese melts best for this recipe?
Mozzarella and provolone melt particularly smoothly.
Cheddar adds a stronger flavor, while using cheddar together with mozzarella gives both richness and stretch.
Can this recipe be made without eggs?
Yes. Replace the egg and milk mixture with about ½ cup of buttermilk or plain yogurt thinned with a tablespoon of water.
The coating should cling well before the chicken is pressed into the breadcrumbs.
Why did the bread become soggy?
Too much sauce, wet vegetables, or steaming-hot chicken can soften the bread.
Use a thin layer of sauce, drain pickles well, and allow the cooked chicken to sit briefly on a rack before assembling.
Can the chicken be prepared ahead?
Yes. The chicken can be cooked earlier in the day and refrigerated.
Reheat it in an oven, skillet, or air fryer to bring back some of its crisp texture before making the melts.
What is the best bread for a chicken melt?
Sturdy white bread, sourdough, or thick-cut sandwich bread are all good choices.
The bread should be firm enough to hold the chicken and cheese without tearing.
Can vegetables be added?
Absolutely. Pickles, tomatoes, onions, jalapeños, and lettuce all work well.
For a crisp texture, add lettuce after the melt has been toasted.
How can the chicken stay juicy?
Avoid cutting the chicken too thin and do not overcook it.
Pounding the chicken evenly and cooking it only until it reaches 165°F (74°C) helps maintain a tender center.
Can the creamy sauce be made ahead?
Yes. Mix the sauce and store it in a covered container in the refrigerator.
It can be prepared up to 3 days ahead, making the final assembly even quicker.
Conclusion
A Crispy Chicken Melt delivers everything a comforting homemade sandwich should have: crunchy golden chicken, soft toasted bread, creamy sauce, and rich melted cheese.
The recipe uses simple ingredients and straightforward steps, making it an excellent choice for beginners and busy home cooks. With a few easy swaps, the melt can become spicy, tangy, extra cheesy, or loaded with fresh vegetables.
Serve it hot with crispy potatoes, a fresh salad, or a cool dipping sauce for a satisfying meal that feels special without requiring much effort.
Give this Crispy Chicken Melt a place on the weekly menu and enjoy that irresistible combination of crisp, creamy, cheesy, and juicy in every bite.