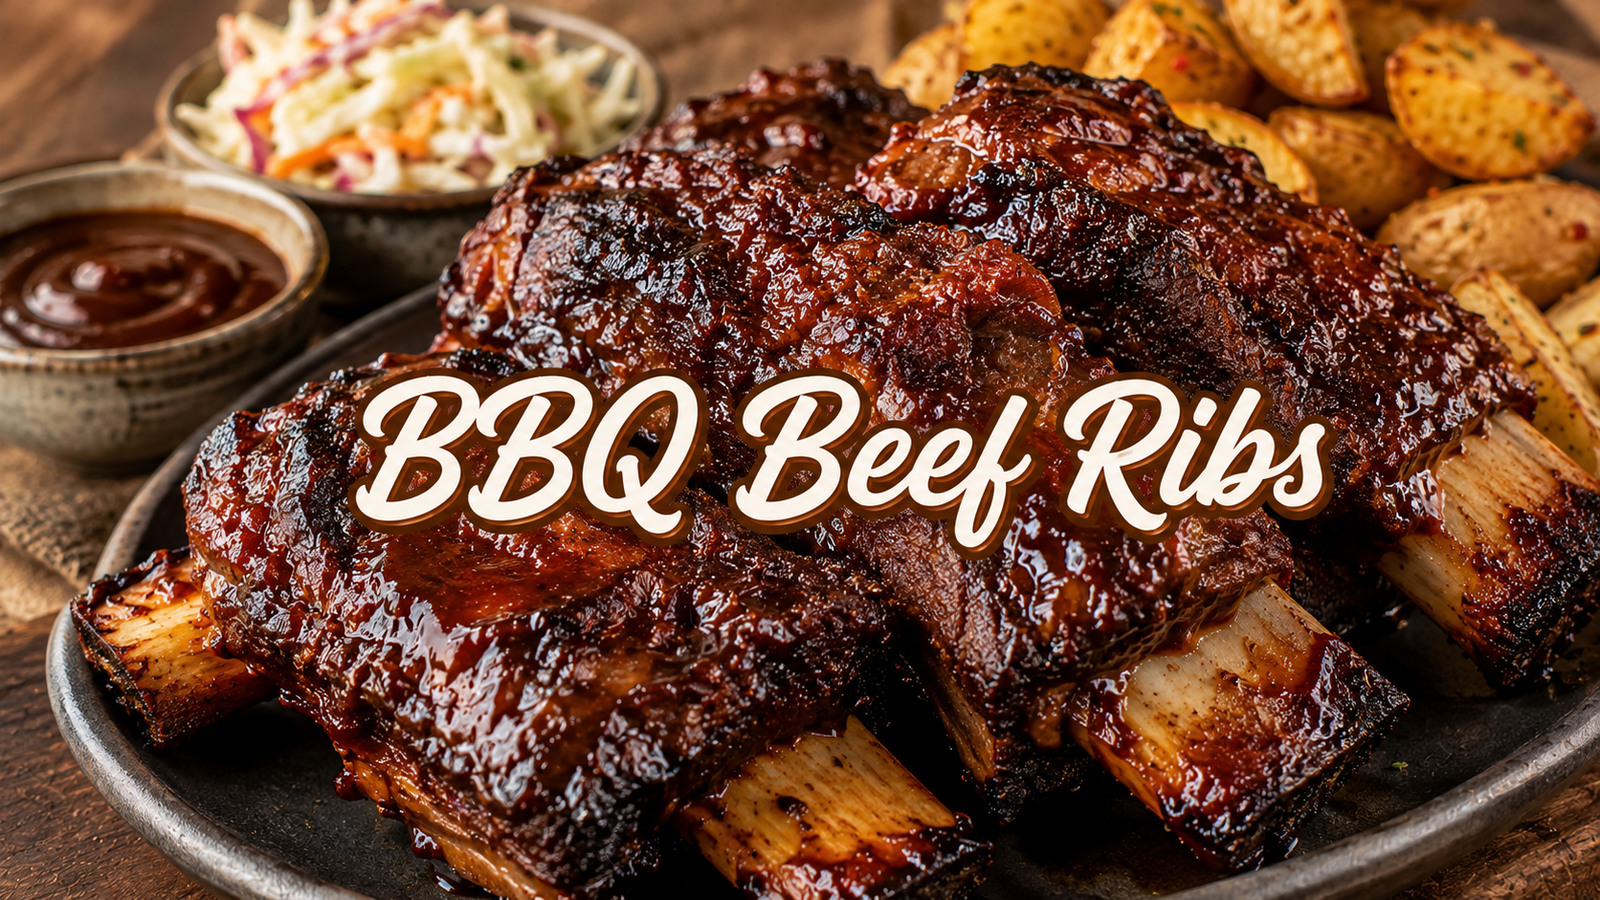
Tender beef ribs covered in a rich BBQ glaze and slow-baked until juicy, smoky, and incredibly soft make these Mud-Baked BBQ Beef Ribs a memorable comfort-food dinner.
The name may sound rustic, but this recipe uses a clean, food-safe oven method rather than putting the meat directly into mud or soil. A tightly sealed foil covering traps moisture around the ribs, creating a slow-baked environment that helps soften the tough connective tissue.
After several hours in the oven, the ribs become deeply tender. The final BBQ glaze adds a sticky, sweet, smoky coating that caramelizes beautifully under high heat.
The result is rich and satisfying without requiring a smoker, outdoor fire pit, or complicated equipment.
This recipe is ideal for home cooks who want barbecue-style beef ribs without spending the entire day tending a grill. Most of the cooking happens in the oven, leaving plenty of time to prepare simple sides.
What Makes Mud-Baked BBQ Beef Ribs So Tender?
Beef ribs contain connective tissue that needs time and gentle heat to break down.
Slow baking allows that connective tissue to soften gradually. The sealed foil packet also helps prevent the ribs from drying out during the long cooking process.
The ribs are first seasoned with a savory spice rub. A small amount of beef broth creates steam inside the packet, keeping the cooking environment moist.
Once tender, the ribs are uncovered and coated with BBQ sauce.
A short blast of high heat caramelizes the sauce, creating glossy, sticky edges and a deeper roasted flavor.
The combination of slow cooking and final glazing gives the ribs two distinct textures: incredibly tender meat underneath and a rich, slightly sticky BBQ coating on top.
Ingredients
For the Beef Ribs
- 3 pounds beef back ribs or meaty beef short ribs
- 1½ tablespoons olive oil
- 1½ teaspoons kosher salt
- 1 teaspoon smoked paprika
- 1 teaspoon sweet paprika
- 1 teaspoon garlic powder
- 1 teaspoon onion powder
- 1 teaspoon ground cumin
- ½ teaspoon black pepper
- ½ teaspoon dried oregano
For the Baking Liquid
- 1 cup low-sodium beef broth
- 2 tablespoons apple cider vinegar
- 1 tablespoon tomato paste
For the BBQ Glaze
- 1 cup alcohol-free, halal-friendly BBQ sauce
- 2 tablespoons honey
- 1 tablespoon tomato paste
- 1 tablespoon apple cider vinegar
- ½ teaspoon smoked paprika
- ¼ teaspoon black pepper
Optional Garnish
- 2 tablespoons chopped fresh parsley
- 1 tablespoon thinly sliced green onion
Choose an alcohol-free BBQ sauce and check the label for wine, beer, cooking alcohol, or other alcohol-derived ingredients. For strict halal preparation, use halal-certified beef and check all packaged ingredients according to personal dietary requirements.
Tools Needed
- Large rimmed baking tray
- Heavy-duty aluminum foil
- Small mixing bowl
- Measuring spoons
- Pastry brush
- Tongs
- Sharp knife
- Cutting board
- Instant-read meat thermometer
Step-by-Step Instructions
1. Prepare the Ribs
Remove the beef ribs from their packaging and pat them thoroughly dry with paper towels.
If a thick membrane remains on the bone side, carefully loosen it with a small knife and pull it away using a paper towel for grip.
Removing the membrane allows the seasoning to reach the meat more effectively and gives the finished ribs a more pleasant texture.
2. Heat the Oven
Preheat the oven to 300°F (150°C).
This moderate temperature gives the ribs enough time to become tender without cooking them too aggressively.
3. Make the Spice Rub
Add the salt, smoked paprika, sweet paprika, garlic powder, onion powder, cumin, black pepper, and oregano to a small bowl.
Mix until evenly combined.
The smoked paprika provides a gentle smoky flavor, while cumin and garlic add depth to the beef.
4. Season the Beef
Rub the olive oil over all sides of the ribs.
Sprinkle the spice mixture evenly over the meat and press it gently into the surface.
Make sure the thicker meatier areas receive a generous coating.
For even deeper flavor, let the seasoned ribs rest in the refrigerator for 1 to 4 hours before baking. If time is limited, they can go directly into the oven.
5. Prepare the Baking Liquid
Whisk together the beef broth, apple cider vinegar, and tomato paste.
The broth adds moisture, while the vinegar provides a subtle tang that balances the rich beef.
The tomato paste adds extra savory depth to the cooking juices.
6. Build the Food-Safe “Mud-Baked” Packet
Place two large sheets of heavy-duty aluminum foil on a baking tray.
Put the seasoned ribs in the center.
Pour the beef broth mixture around the ribs rather than directly over the top.
Fold the foil tightly over the ribs, creating a sealed packet.
Use additional foil if needed to make sure the package is completely closed.
The sealed packet is what creates the moist, slow-cooking environment associated with the rustic mud-baking concept.
Do not use actual soil, mud, clay from outdoors, or unverified earth materials around food.
7. Slow-Bake the Ribs
Place the covered tray in the preheated oven.
Bake for approximately 3 to 3½ hours.
The exact cooking time depends on the thickness and type of ribs.
Begin checking around the 3-hour mark. The meat should be very tender and should pull away from the bones easily.

8. Check for Tenderness
Carefully open the foil because hot steam will escape.
Use tongs to gently test the ribs.
A fork should slide into the meat with very little resistance.
For a more precise check, use an instant-read thermometer in the thickest portion of the meat without touching the bone. Beef ribs are ready for the finishing stage when they are deeply tender rather than relying on temperature alone.
9. Make the BBQ Glaze
While the ribs are cooking, combine the BBQ sauce, honey, tomato paste, apple cider vinegar, smoked paprika, and black pepper in a small bowl.
Stir until smooth.
The honey adds a glossy sweetness that helps the sauce caramelize during the final roasting stage.
10. Uncover the Ribs
Once the ribs are tender, carefully remove the foil.
Increase the oven temperature to 425°F (220°C).
Drain most of the cooking liquid from the tray, leaving only a small amount around the ribs.
Pat the exposed surface gently with paper towels if it is very wet.
This helps the BBQ glaze cling to the meat instead of sliding off.
11. Add the BBQ Sauce
Brush a generous layer of the BBQ glaze over the top and sides of the ribs.
Place the tray back into the oven uncovered.
Bake for 10 minutes.
12. Add a Second Layer of Glaze
Remove the ribs and brush them with another layer of BBQ sauce.
Return them to the oven for another 5 to 8 minutes.
Watch carefully during this stage because the honey in the glaze can darken quickly.
The finished coating should look glossy, thick, and lightly caramelized.
13. Rest the Ribs
Remove the ribs from the oven and let them rest for 10 to 15 minutes.
Resting allows the juices to settle and makes the ribs easier to cut without losing too much moisture.
14. Slice and Serve
Cut the ribs between the bones using a sharp knife.
Arrange them on a serving platter.
Brush with any remaining BBQ glaze and sprinkle with fresh parsley or green onion if desired.
Serve hot with your favorite sides.
Mud-Baked BBQ Beef Ribs Tips & Variations
Use Meaty Ribs
The meatier the ribs, the more satisfying the final dish.
Beef back ribs are usually long and meaty around the bones, while short ribs tend to be thicker and richer.
Either works well as long as the pieces fit comfortably on the baking tray.
Do Not Skip the Foil Seal
The sealed foil packet is essential to the method.
If steam escapes throughout cooking, the ribs can take longer to become tender and may lose moisture.
Use heavy-duty foil and add another layer if the first sheet has any tears.
Give the Rub Time to Work
A short resting period allows the salt and spices to penetrate the surface.
Even 30 minutes helps, although several hours in the refrigerator can provide more developed seasoning.
Avoid Too Much Liquid
The ribs do not need to be submerged.
The purpose of the broth mixture is to create a moist cooking environment, not to boil the beef.
Keep the liquid around the ribs rather than covering them.
Do Not Rush the Tender Stage
Tough ribs cannot be made tender simply by adding more BBQ sauce.
The meat needs enough time for its connective tissue to break down.
If the ribs are still firm after 3 hours, reseal the foil and continue baking in 20- to 30-minute increments.
Watch the Final Glaze
The final high-temperature stage is short.
Because the sauce contains honey, leaving the ribs under high heat for too long can cause the glaze to burn.
Stay nearby and remove the ribs when the sauce becomes glossy and caramelized.
Try a Spicier Rub
For spicy BBQ ribs, add ½ teaspoon of cayenne pepper to the spice mixture.
A little crushed red pepper can also add heat without changing the overall flavor.
Make the Sauce Tangier
For a sharper BBQ flavor, increase the apple cider vinegar in the glaze from 1 tablespoon to 1½ tablespoons.
The extra acidity works especially well with rich beef.
Add Garlic
For a deeper savory flavor, add 2 minced garlic cloves to the BBQ glaze.
Fresh garlic becomes sweet and aromatic during the final baking stage.
Use Honey Carefully
Honey creates a beautiful sticky finish, but it also browns quickly.
Keep the final glaze stage short and monitor the ribs closely.
Add Caramelized Onions
Soft caramelized onions make an excellent topping.
Cook thinly sliced onions separately until golden and tender, then spoon them over the finished ribs.
Their natural sweetness pairs beautifully with smoky BBQ sauce.
Common Mistakes to Avoid
One mistake is opening the foil repeatedly during slow cooking.
Every opening releases heat and steam, which can extend the cooking time.
Another mistake is cutting into the ribs immediately after removing them from the oven.
Resting the meat for 10 to 15 minutes helps preserve its juicy texture.
Avoid using an extremely thick layer of BBQ sauce before the final high-heat stage. Too much sauce can become overly sweet and may burn before the ribs develop a beautiful caramelized finish.
Most importantly, never wrap meat directly in soil, mud, or outdoor clay. Those materials are not food-safe and may contain harmful microorganisms or contaminants.
Storage & Serving
Allow leftover ribs to cool slightly before storing them.
Place the ribs in an airtight container and refrigerate within 2 hours of cooking.
They can be stored in the refrigerator for up to 3 to 4 days.
For longer storage, wrap individual portions tightly and place them in a freezer-safe container or bag.
Frozen cooked ribs are best used within 2 to 3 months for good quality.
Thaw frozen ribs overnight in the refrigerator before reheating.
How to Reheat the Ribs
For the best texture, place the ribs in a covered baking dish with a few tablespoons of beef broth or water.
Cover with foil and reheat at 300°F (150°C) until hot throughout.
Brush with a little extra BBQ sauce during the final few minutes and uncover briefly to refresh the glaze.
An air fryer can also work well for smaller portions. Heat at approximately 350°F (175°C) until warmed through, checking frequently so the sauce does not burn.

What to Serve With BBQ Beef Ribs
These ribs are rich and flavorful, so fresh or lightly seasoned sides create a good balance.
Serve them with:
- Creamy coleslaw
- Corn on the cob
- Roasted potatoes
- Baked potatoes
- Green salad
- Grilled vegetables
- Cucumber salad
- Potato salad
- Steamed corn
- Warm flatbread
For a classic BBQ plate, combine the ribs with creamy coleslaw and roasted potatoes.
For a lighter dinner, serve them with a crisp cucumber salad and grilled vegetables.
Frequently Asked Questions
Can actual mud be used to bake beef ribs?
Actual outdoor mud or soil should not be used for food preparation.
It can contain bacteria, parasites, chemicals, animal waste, and other contaminants. The sealed foil oven method provides a much safer way to achieve slow, moist cooking.
What cut of beef is best for this recipe?
Meaty beef back ribs and beef short ribs both work well.
Short ribs are thicker and particularly rich, while back ribs provide a more traditional rib shape.
Why are the ribs still tough after several hours?
They may simply need more cooking time.
Beef ribs become tender when their connective tissue has had enough time to break down. Reseal the packet and continue baking until a fork slides into the meat easily.
Can the ribs be cooked at a lower temperature?
Yes. A lower oven temperature can be used, but the cooking time will increase.
Keep the ribs tightly covered and check periodically for tenderness rather than relying on a fixed cooking time.
Can these ribs be made without honey?
Yes. Replace the honey with 1 tablespoon of maple syrup or brown sugar.
The glaze may have a slightly different flavor, but it will still caramelize nicely.
Can boneless beef ribs be used?
Yes. Boneless beef ribs can be used, although their cooking time may differ based on thickness.
Begin checking for tenderness earlier than the recipe’s suggested finishing time.
Can the ribs be prepared the day before?
Yes. Cook the ribs until tender, cool them safely, and refrigerate them in an airtight container.
The next day, brush them with BBQ glaze and reheat them uncovered until hot and caramelized.
How can the ribs get a smokier flavor without a smoker?
Smoked paprika adds a gentle smoky note without requiring a smoker.
An alcohol-free BBQ sauce with a naturally smoky flavor can also deepen the barbecue character.
Can the ribs be cooked on a grill?
Yes, but the cooking method changes.
The ribs can be slow-cooked until tender first and then transferred to a grill for the final BBQ glazing and caramelization.
How do you know when beef ribs are done?
Tenderness is the most useful indicator.
The meat should yield easily to a fork or probe and should separate from the bone with little resistance. Use a meat thermometer as an additional food-safety check, especially during preparation.
Conclusion
These Mud-Baked BBQ Beef Ribs bring rustic barbecue flavor to the home kitchen with a simple, food-safe oven method. Slow baking creates tender, juicy beef, while the final BBQ glaze delivers a rich, smoky, sticky finish.
The recipe requires no smoker and no complicated cooking equipment. Once the ribs are sealed and placed in the oven, most of the work is simply waiting for the meat to become beautifully tender.
Serve the finished ribs with creamy coleslaw, roasted potatoes, fresh salad, or grilled vegetables for a hearty meal that feels special without being difficult.
For a juicy, richly seasoned BBQ dinner with minimal fuss, Mud-Baked BBQ Beef Ribs are a delicious recipe to try and share.